Sunday, November 24, 2013

Annie’s Moist, Delicious, and Perfect-Every-Time Turkey


With Thanksgiving Day looming at only 4 days away, many of us are preparing to prepare a turkey for our friends and family. The following recipe is the simplest and yummiest recipe I have ever come across. I get a perfect turkey every single time.


Annie’s Moist, Delicious, and Perfect-Every-Time Turkey

  • Acquire a turkey that will meet your needs. In our household, we enjoy having several meals worth of leftovers, so I always buy the biggest turkey I can find.
  • Thaw according to directions. This may take several days in a refrigerated place. Please take this into account when planning your timetable for your meal.
  • Obtain a pan large enough to fit your turkey. Be sure that it has sides that are at least 2 inches tall.
  • Remove wrapper from turkey. Leave skin on. Rinse if you wish. Be sure to remove giblets from interior of turkey. They will be found in a bag. Remove bag from turkey. If you wish, you may place giblets back into the turkey. My family enjoys them immensely.
  • Open a Reynolds turkey bag. Place 2 tablespoons of flour in bag. Close bag and shake, evenly distributing the flour on the inside of the bag.
  • Place turkey in bag. This may take two people if the turkey is large.
  • Close bag, making sure to leave plenty of room in the bag for the bag to expand.
  • Cut six-1 inch slits in top of bag.
  • Place turkey on bottom rack of oven.
  • Set oven to 250 degrees. Walk away for 11 hours.
  • At the beginning of the 12th hour, increase heat to 350 degrees. I use this time to also bake another dish that will be needed for my Thanksgiving meal.
  • Before removing from oven, be sure to insert a meat thermometer into your turkey to ensure it is cooked through.
  • Remove turkey from bag, placing it gently onto a platter.
  • You may use the turkey broth that is left in the bag for gravy, stuffing, or soup base.

I hope that you enjoy your moist and delicious turkey as much as we enjoy ours!

Happy Thanksgiving!

~Annie

If you would like to follow Homestead Annie on Facebook, please follow this link.

Sunday, October 20, 2013

Annie’s Simple And Healthy Pan-Fried Fish


JP loves anything fried. Anything.  The problem is, I don’t. I do not like the smell, the muss, the fuss, or the unhealthiness of fried food. Recently, I have come up with a new recipe that gives JP his fried fish, while at the same time, giving me the good feeling of fixing a healthy meal for my family.

Annie’s Simple And Healthy Pan-Fried Fish

  • Pour 2 tablespoons of extra virgin olive oil into a skillet heated to a medium low heat.
  • Sprinkle a thin layer of corn meal onto plate.
  • Coat fish by lying each filet down in the cornmeal on each side.
  • Place coated fish in heated skillet.
  • Sprinkle with salt and pepper to taste. Cover.
  • Walk away for 4 minutes.
  • Turn filets over. Turn heat to a medium heat. Leave uncovered. Walk away for three minutes.
  • Turn filets. Walk away for two minutes.
  • Remove from skillet and place on paper towel.
  • Enjoy!

A wonderful, healthy, pan-fried fish filet made in minutes!

~Annie

If you would like to follow Homestead Annie on Facebook, simply click here.

Thursday, October 17, 2013

Annie’s Magnificent Homemade Mashed Potatoes


Comfort foods come in many shapes and sizes. One such comfort food is homemade mashed potatoes.

Mashed potatoes are a simple and easy dish. I hope your family finds it to be as delicious as mine does.

Annie’s Magnificent Homemade Mashed Potatoes

  • Peel eight medium-sized potatoes. Quarter them and place in pot of water, with water covering them by at least 1 inch.
  • Place wooden spoon across the top of the pot. This will prevent the pot from boiling over.
  • Boil until potatoes are softened. Drain.
  • Add ¼ cup of butter. Not margarine, y’all. Butter.
  • Add 2 teaspoons of sea salt. Regular table salt will do in a pinch.
  • Allow butter to melt into the potatoes.
  • Mash potatoes with a potato masher. I suppose you can use a mixer if you absolutely must, but I really would rather you invest in a good masher with little squares in it. It gives the potatoes the perfect consistency.
  • Once mashed, add milk as needed. I usually start out with ½ cup of milk. Stir it in, and then add more milk until it is the consistency you desire.
  • Dish into serving bowl, sprinkle with chives if you wish, and serve.

Voila! Super yummy homemade mashed potatoes, made by you, for those you love.

~Annie

If you would like to follow Homestead Annie on Facebook, simply click here .

Thursday, October 10, 2013

The Day I Married Away My Sweet Mama


The following is my Matron of Honor speech from my sweet mama’s wedding. Many people that were not able to attend have asked to see it. Many people have asked me my thoughts on my sweet mama getting remarried.  The following should answer all questions:


"Good Afternoon.

My name is Annie.

Thank you for coming to celebrate with us today.

Today we are celebrating the union of my sweet mama to her sweetheart, Dave.

My sweet mama has always been my hero. I never truly understood how little we had because my mama made the best of everything. When I was pregnant with Emma, she moved here to be closer to us, and to be a daily part of Emma’s life. For this, I will be forever grateful.

Dave came into my life a little over a year ago.

In that time, he has come to mean so much to us.

He is my friend, my rescuer of flat tires. My chauffer. My baby sitter after my surgery. A hand to hold while laying on my hospital bed. 

He stepped into a role I thought would never be filled again. I am honored that today, Dave became my Dad.

Today we celebrate the marriage of two people very dear to me.

Today our family gained a husband, a father, and a grandfather. Welcome  to our family, Dave.

We love you."

~Annie

If you would like to follow Homestead Annie on Facebook, simply click here.

Tuesday, October 1, 2013

Purposeful Encouragment


Purposeful encouragement. How many of us live our lives purposefully encouraging others? Choosing to go out of our way to make someone’s life a little easier?

Yesterday I wrote a Facebook status about this topic, but I want to expand on it. I cannot stop thinking about how purposeful encouragement can change lives.

Recently, I was on the phone with a customer service representative from my phone company. My phone and my Internet had both gone down, so I had called in to see what was the matter. Throughout the course of our 30-minute conversation, the gentleman on the other end of the phone thanked me five times for being nice to him. Five. In all truthfulness, I wasn’t being overly nice, I was just being myself. However, I had learned something long before this call: it is rarely the fault of the person on the other end of the phone call that you are having difficulties. They are just doing their job to the best of their ability, and the job is a lot easier and more enjoyable if they are not getting yelled at every time they answer the phone. The customer service representative finally asked me why I was so different than the other callers. I told him the one thing that I could. I have Jesus in my life.

Jesus. Now there is a purposeful encourager if you ever did see one. That man encouraged others even as he was dying. As he was dying, y’all. There he was, hanging on a cross, bleeding, struggling to breathe, encouraging and comforting the thief on the cross.

This realization sunk in a few years back. I figured if Jesus could encourage others in his last breaths, surely I could encourage people around me as well. Even when I do not feel very well, I can still encourage others. Even if I am busy, I can encourage others. Even if I am low on funds, I can encourage others.

So many people suffer in silence. So many people need our love. Those that are ill…those that are watching a loved one die…those that lost their job…those that have lost a relationship…those that were recently diagnosed with a disease…those that have just recently become parents…those that have just moved to a new house/neighborhood/job/school/church…those that are headed out to the mission field….those that think they haven’t a friend in the world. They all need encouragement.

Make homemade soup or a meal to those that are ill or just had surgery. Sit with and listen to those that need to process their thoughts and feelings about the loss of a loved one. Gift a recently unemployed family some food, the money for the electric bill, or supper at your home as a night out. When JP lost his job during the mass layoffs several years ago, a family from our church gave us a huge box of food. Another family came to visit us. It was so encouraging to know we were not alone.

Listen as your friend cries over the loss of a relationship with a significant other. Let them know that they are still desirable and loved.

 Volunteer to hold the new baby while the new mom takes a shower, naps, or gets caught up on laundry. Vocalize how wonderful it is to hear the newborn mewlings of an infant during the worship service at your church. When Little Bug was a few weeks old, a sweet friend came over and held Little Bug while I showered, fed and watered the animals, and cleaned up the house a bit. It felt wonderful to know that Little Bug was being taken care of, and that I was able to do a few things that needed to be done. I used to leave the sanctuary whenever Little Bug would start to cry. However, one day, an elderly lady from our church came up to me and told me how Little Bug’s little cries were like music to her ears, and thanked me for still coming to church even though she knew how difficult it must be to get out the door and to the church as a new mom. Those words stayed with me, and I now tell others those same, true words.

Welcome those that are new to a situation. Introduce them to others and make sure they know their way around. Give to those that venture out on missions trips, whether young or old, whether $1 or $100. The encouragement is endless. Once, JP and I were going on a missions trip to Russia. A nine-year-old girl from our church heard our presentation about it at church, went home, emptied her piggy bank, and gave the entire contents towards missions. That was the most absolutely encouraging thing that could of happened for JP and I before leaving to share the Gospel to others.

Send a card. Pick up the phone. Smile at every single person you see. So many times in my life, a smile makes all the difference. Usually people do a double take when they see me smile. First they look around to see if I am smiling at someone near them. Then they look again to see if I am really smiling at them. I then am usually rewarded with a beautiful smile back. A smile is free, and can change everything.

Write thank you notes. Not only for gifts that you have received, but for a job well done as well. Last year, Little Bug and I went on a fieldtrip to Chicago. Our long line of busses had to weave in and out of very busy streets. Our bus driver did an amazing job of calmly and safely navigating through areas with mere inches on either side of the bus. I wrote him  a thank you note. It took less than 30 seconds of my time, but I wanted him to know how much a I appreciated him. I heard later that he showed that note to everyone in the bus garage. A little encouragement can go a long way.

Encourage the teachers in your life. So many rules are being brought down on teachers, that they are having a hard time feeling like they are successfully educating our little ones. If you have the time, volunteer in your school. Not only does this encourage the teacher, the students get extra help that they desperately need.

Encourage those that feel they have no one. Let others know that you care and that you love them right where they are, no change needed. Let them see in you a person that truly in interested in them. So many people just need to know that someone cares. Once they have this knowledge, they are able to successfully navigate through life.

Take the time to share in others' burdens. To lift up and edify others. To let God's love shine through you. Just look around you...everyone needs someone. I challenge you to be that someone.  To become a purposeful encourager.
 
~Annie

If you would like to follow Homestead Annie of Facebook, simply click here.

Sunday, September 29, 2013

Homestead Annie’s Crock Pot Breakfast Casserole


There are mornings that I just do not feel like cooking breakfast, but need to have something to feed my troop. On those mornings, I love to awake to the wonderful smell of my breakfast casserole, ready and waiting to be eaten.

You can make this the evening before, turn it on before you go to bed, and know that you will have a scrumptious breakfast in the morning.

Homestead Annie’s Crock Pot Breakfast Casserole

  • Spray crock-pot with non-stick cooking spray.
  • Cook 7-10 pieces of bacon, cutting them into 1-inch pieces.
  • Chop 1 onion, 1 bell pepper, and 1 clove of garlic. Sauté.
  • Place 1/3 bag of shredded hash browns in bottom of crock-pot.
  • Layer1/3 sautéed mixture and 1/3 bacon onto hash browns.
  • Add 1/3 bag of shredded cheese. Repeat layers until all ingredients have been added.
  • In a separate bowl, mix 1 dozen eggs, 1-cup milk, and salt and pepper to taste.
  • Pour over crock-pot mixture.
  • Place lid on crock pot and set to low for 8 hours.


Enjoy the beginnings of autumn, my lovelies!

~Annie

If you would like to follow Homestead Annie on Facebook, please click here.

Tuesday, September 17, 2013

Annie’s Pickled Jalapeno Slices


Around this time of year, I start to can the jalapenos from everyone’s gardens. I say everyone’s, because many of my friends and family start off with great intentions, then come to realize they have too many to eat fresh, call me, and I collect them!

Jalapenos are very simple to can once you have everything set up. Today I did 18 jars worth in 1 ½ hours, including water bath processing time.

Annie’s Pickled Jalapeno Slices

  • Heat water in water bath canner to boiling.
  • Wash whole jalapenos.
  • Mix the following: 2 quarts of water, 1 ½ cups of white vinegar, and 2 tablespoons of canning salt in a pot. Bring to a boil. This is your brine. You may change the amounts of the ingredients if you wish. However, I did this once, and it threw off the taste and texture of the peppers.
  • Prepare jars.
  • Put on rubber gloves. This is very important. The oils from the peppers will burn your skin, eyes, mouth, and nose.
  • Slice up peppers, cold packing them in heated jars. To heat jars, boil water in a teakettle, then pour into jars. Cold packing of jars means that you do not cook the produce ahead of time, just place it in raw.
  • Pour brine into jars, over peppers, leaving ½ inch headspace.
  • Wipe jar rims with clean cloth.
  • Place heated lid on jar. Screw on band loosely.
  • Process as follows: quart jars 25 minutes. Pint jars, 15 minutes. Half pint jars, 10 minutes.


These peppers taste exactly like those jarred jalapenos found in the stores, with none on the chemicals and preservatives added. Try them for yourself!

~Annie

If you would like to follow Homestead Annie on Facebook, simply click here.

Monday, September 16, 2013

Jen’s Sautéed Peppers


Over the summer, I had the opportunity to stay with my sweet friend, Jen. While there, she fixed us some fabulous sautéed peppers.

Now that peppers are plentiful, both in the garden and in the grocery, I thought I would share her delicious recipe with you all.

Jen’s Sautéed Peppers

·        Chunk your peppers. I like to use a nice mix of sweet and hot peppers in different colors to give a variety of color and heat.
·        Place pan on low heat.
·        Drizzle olive oil on bottom of pan.
·        Toss in peppers.
·        Liberally apply balsamic vinaigrette over all of the peppers.
·        If you are feeling extra frisky, add a tablespoon or so of minced garlic.
·        Sautee over a low heat, stirring occasionally, until peppers are to desired tenderness.

For variation, you may want to try adding onions or mushrooms (or both!) to the mix.

The first time I made this for my family, they ate it so quickly, I hardly had the opportunity to have any! I now know to make a double batch, every time!

~Annie

If you would like to follow Homestead Annie on Facebook, simply click here.

Wednesday, September 11, 2013

9/11:Through The Eyes Of A Teacher


A lot will be said about America today. About what America should do in Syria. About how America fits into the bigger picture of the world. About how America coped with the largest terrorist attack it has ever seen just twelve short years ago.

I cannot tell you the tale of all of America in the aftermath of 9/11. I can only tell you one story. Mine.

I was a first year teacher at a small parochial school in northwest Indiana. I taught a dual grade classroom, 27 fifth and sixth graders. 27 ten and eleven-year-olds. All neatly in their seats. All turned to lesson 17 of their math books. All listening intently on that day’s lesson while I explained it to them, giving examples on the chalkboard.

About 8:50 in the morning on a sunny Tuesday, the school secretary came in to tell me that there had been a terrible accident involving a passenger jet and a skyscraper in New York City. I told her that we would pray for all involved. And we did. Right then. Right there. We stopped Math class and prayed for the victims and their families.

The lesson went on for about fifteen more minutes, at which time the secretary asked to see me in the hallway. She informed me that a second airliner had just hit another tower in New York City. That this was no longer viewed as an accident, but an attack.

Once again the class prayed with me. This time not only for victims and their families, but also for safety for our Nation.

I chose to take my class outside for recess. It seemed that we all needed a break from the cold reality that was setting in.

Upon arrival back to our room, we knew that The Pentagon had been hit, then that another plane had gone down in a field in Pennsylvania.

As I tried to absorb and process this information, I glanced around the room. What I saw still gives me shivers to this day.

My sweet, innocent students had a certain haunting look in their eyes. While unable to grasp the full impact of what was happening, they knew that people were dying and that their country was under attack by an unknown assailant.

Gone were the looks of glee. The merriment in their eyes. Gone was the laughter and chatter. In its place was solemnity and confusion.

What was I to do with these 27 children? I had been entrusted by their parents and our school to take care of them the best way I knew how. How in the world was I supposed to protect them? These thoughts raced through my mind throughout the rest of the day.

We carried out the rest of the day, going through the motions of class, talking through our fears, trying to wrap our heads around why someone would bomb innocent people. My students had questions that I could not answer.

I knew that my students would take their cues from me. If I was calm, they would remain calm. I continued on through the day as if nothing new had happened, and as if it was an everyday occurrence that our country has terrorists’ attacks. Inside, I was screaming. I was raging. I was bawling. Only, on the outside, I wasn’t. I was smiling. I was reassuring children. I was the epitome of calm.

One little guy was just sure that they would bomb our town because we had two water towers. While I assured him that we had nothing that was worth bombing, I thought to all of those people in places that did. To what they were doing. To how they were dealing with the day’s events.

Finally, dismissal arrived. I hugged each of the students as they left. Hoping to reassure them. Many parents picked up their children from school that day, feeling the need to be with their families.

We held a short staff meeting after school, and then went out separate ways. I had needed to stop at the gasoline store to fill up my car, but the line was a quarter mile long, so I bypassed that stop and just went home.

I fought the urge to turn on the television set. To this day I thank God that I did. I did not need those horrific images seared into my head from multiple views. The photos and radio reports were quite enough to crumple me to the floor in a heap of tears.

JP and I went to bed that night in silence, for what was there to say?

The next morning, I returned to school. My sweet students had an aged look about them. Gone forever was the childhood innocence. All was taken from them the day before. Most had watched what I had not. Most had seen people fall to their deaths. People burned alive. People running through the streets and collapsing. Most had seen the worst of human nature.

However, that fateful day, they had seen something else. Something far greater than the evil of man. They had seen the resilience of America.

America had fallen under attack, but it was not down for long. The American Spirit was revived. No longer were we Democrats, Republicans, Jews, Greeks, and Dutch. No longer were we Caucasians, Hispanic, Asian, and African American. No longer were we old, young, rich and poor. We were Americans.

Americans that held each other. Helped each other. Carried each other. We watched as ordinary people did extraordinary acts of bravery. We discussed how we could help, then put our plans into action.

Yes, my students and I lost the feeling of safety in our country on September 11, 2001. However, we found ourselves united with others across our great land in a large wave of patriotism.

Never had I seen so many American flags. Never had I seen so many people stand for our National Anthem. Never had I seen so many people participate in the Pledge of Allegiance.

Even to this day, twelve years later, the term “9/11” is stated, and instant chills run through my body. I stand a little straighter. I take a moment to remember those that lost their lives. I thank God that the final victim count was not higher.
So today, I will remember. I will weep. I will pray. I will watch. I will listen. I will reminisce. However, I will also ponder on this question: Why did it take such a huge atrocity in our own country for our country to swell with national pride and patriotism?

May we never forget that fateful, sunny, Tuesday morning. May we never forget where we were. For me, it was standing in front of a classroom full of children that trusted me. May we always remember that, no matter our political party, our religion, our race, we are all Americans.

God bless you all, and God bless our wonderful and beautiful United States of America.

~Annie

If you would like to follow Homestead Annie on Facebook, simply click here.

Tuesday, September 10, 2013

Annie’s Eggplant Moussaka


Every year, as I plan my garden, I decide to grow eggplant. It is such a pretty plant and the eggplant itself is interesting. However, I found eggplant to be a bit bland for my taste, steamed or fried. It needed to be a part of a cassrole.

I decided to make my own Eggplant Moussaka. It was heavenly. So much so, that I wanted to write it down before I forgot my new recipe.

Annie’s Eggplant Moussaka

  • Brown 1 pound of ground beef.
  • Chop and onion. Add.
  • Add ½ cup tomato sauce.
  • Add 1 cup water.
  • Add 2 tsp. parsley.
  • 1 tsp. nutmeg. (Trust me. It adds a little zip.)
  • 1 tsp. sea salt. (Or regular table salt, if you prefer.)
  • ½ tsp. pepper.
  • Stir well and let simmer while you deal with the eggplant.
  • Chop the ends off of two to three eggplant, peel and slice them.
  • Sauté the eggplant slices in a bit of olive oil.
  • While the eggplant sautés, ready your mashed potatoes. If you do not feel like making real mashed potatoes, go ahead and use instant. I’m not going to tell.
  • Once the meat mixture, the eggplant and potatoes are ready, grab a casserole dish, spraying the bottom as you go.
  • Begin layering the casserole with a layer of eggplant, followed by the meat mixture, and finally potatoes. Repeat this process until you have used all of your ingredients, ending with potatoes on the top.
  • At this point, you may want to sprinkle cheese over the top. It adds a bit of flavor and color for those festive occasions, like Tuesday nights.
  • Bake in a 350-degree oven for 25 minutes.
  • Serve.

I enjoy mine with raw onion. I find that it enhances the Moussaka quite well. I hope you all enjoy this yummy recipe as much as I do. It is a terrific way to use eggplant!

~Annie

If you would like to follow Homestead Annie on Facebook,please click here.

Sunday, September 8, 2013

Annie’s All-Natural Microwave Popcorn


Today, Little Bug wanted popcorn. We haven’t made popcorn in years at our house. The microwaveable bags were always so easy to do, but the chemicals that are found in them had made me throw out all that I had in the pantry, many years ago.

Fortunately, I had purchased some organic popcorn last week, so I was prepared. Also, I had come across a phenomenal way to have the ease of microwave popcorn, while at the same time avoiding all of the chemicals, fats, and salts that come from convenience.


Annie’s All-Natural Microwave Popcorn

  • Pour ¼- ½ cup of popping corn into a see-through large glass microwaveable bowl.
  • Place shallow bowl or plate atop large bowl.
  • Place in microwave and set for 5 minutes, being sure to stay near the microwave. The popping corn will begin to pop around the two-minute mark. Continue to allow microwave to run until you can slowly count to five between pops. If any kernels are not popped, you can put the bowl back in with the unpopped kernels to repeat the process.
  • Once finished, remove from microwave. The bowl will be very hot. Pour into separate bowls and enjoy your delicious treat!
  • If you wish, you may drizzle melted butter and sea salt over the top of your popped kernels for extra yumminess!

It really is that simple!

Have a lovely evening!

~Annie

If you would like to follow Homestead Annie on Facebook, simply click here.

Monday, September 2, 2013

Annie’s Homemade Baby Wipes


While Little Bug is past the age of baby wipes, I used this recipe for years. It can also be used for wipes that are carried in your vehicle for those “oops” moments in life.

The wipes are easy to make, very inexpensive, and best of all, you get to control what goes into them! All natural, organic, fragrance free, anything you wish!

Annie’s Homemade Baby Wipes

  • Purchase Bounty paper towels (or any thick brand.)
  • Cut towels into 1/4s for first year, and 1/2s for babies older than 1 year.
  • Bring 2 ½ cups of water to a boil.
  • Add 1-2 Tablespoons of your choice of baby lotion to water.
  • Add 1-3 teaspoons of your choice of baby oil to the mixture.
  • Add 1 teaspoon of your choice of baby bath soap to mixture. (optional.)
  • Mix well.
  • Place towels into container.
  • Pour mixture over towels slowly, allowing time for towels to absorb the liquid.
  • Let towels be for ten minutes.
  • Drain off any excess liquids.

This recipe will make 2-3 normal containers worth of wipes from the store, at a fraction of the price. I stored mine in gallon-sized Ziploc bags.

You may also add ointment for diaper rashes to the mixture if you wish.

I found this to be a great recipe that worked well for our little one. I hope it does the same for yours!

Have a wonderful week!

~Annie

If you would like to follow Homestead Annie, simply click here.

Sunday, September 1, 2013

Annie’s Temporary Tomato Preservation Technique


Although this is the peak of canning season, sometimes life will throw you curve balls that make it simply impossible to continue with canning at the present time.

While I do can several items, the most important food for me to can is every yellow tomato I can get my hands on.

JP enjoys my yellow tomato chili. Of course yellow tomatoes are very hard to come by in the middle of the winter, so I try to put up as many quarts of yellow tomatoes as possible each summer.

This year I have been waylaid by surgery, so I came up with a quick and easy way to keep my tomatoes until I am ready to process them. It works well for me, and I hope that you will be able to use it also!

Annie’s Temporary Tomato Preservation Technique

  • Pick tomatoes, making sure to take stem off.
  • Wash tomatoes, allowing them to dry.
  • Cut out stem and core, being sure to also cut off any spots.
  • Place in freezer Ziploc bag.
  • Place bag in freezer.

When you are ready to process your tomatoes, remove bag from freezer and allow it to thaw completely. I make all of my tomato sauce with the skins, so I just throw the entire tomato into boiling water. The skin has vital nutrients that I believe should be kept. More on how I process my tomatoes and the nutritional value of the skins in a later post.

If you would like to follow Homestead Annie on Facebook, simply click here.
 
Enjoy your Labor Day weekend, my friends!

~Annie

Saturday, August 31, 2013

Why Annie Has Been MIA For Two Weeks


As some of you know, I am recovering from a weekend stay in the hospital. I have been inexplicably ill for several months, and it finally all came to a head last week when I found out that my gallbladder was no longer playing nicely with others in the sandbox of my body.

I had an emergency laparoscopic cholecystectomy. In other words, I had my gall bladder removed.

I found out a few things while living through my ordeal. First of all, it had never occurred to me that my gallbladder was to blame. In hindsight, of course it was my gallbladder!

Almost every time I ate, I had pains in my abdomen for 5 seconds to 30 minutes. Every time I drank coffee. Every time I had a hamburger. Every time I ate pizza. Every time.

Here is the kicker: my gallbladder became infected due to a very large gallstone. The gallstone happened due to my sudden weight loss (40 pounds over the past 6 months.) The sudden weight loss is due to a sugar and dairy allergy that I had formed over the past few years. So, as a reward for losing weight, I got the grand prize of losing an organ!

I am so glad that the doctors found out what was wrong with me. As the months passed, I became sicker and sicker. I started to pass out at the most inopportune times. I could not breathe well. I became weaker and weaker.

Last Thursday, I was in so much pain, that I called TC to ask him to drive me to the doctor’s office. After a preliminary check, I was sent to the hospital for lab tests. I was on my way to one hospital, but was in so much pain, that TC took me to the nearest one. It is a tiny, country hospital, located in ruralville USA.

Our little hospital met and far exceeded every expectation and hope that I had. The entire staff was exceptional. Friendly, knowledgeable, and amazing! If I only learned one thing this past week, it is to never underestimate your local, country hospital.

Give the small hospitals a chance. At my country hospital, the following happened. The ER doctor talked the surgeon into staying late at his office to see me. The surgeon admitted me to the hospital to manage my pain, then stayed even later to read some tests that he ordered. In the morning, the surgeon came back, bright and early to order more tests, read them, and do an emergency surgery on me.

Once in back in my room, I was taken care of by a wonderful staff of nurses and aides, as well as my entire family and several friends. Being released the next day, I have been home recuperating for the past week.

Now that I am home and starting to feel better, I will hopefully have a bit of time for writing, especially since I am still under full restrictions for another week. More writing time means more posts full of tips and recipes that you may find useful.

So, there you have it. Why I haven’t been around for a while. Why you should try small town hospital. Why you will see more posts on my blog. I have missed you all, and look forward to hearing from you.

Here’s to living each day to the fullest, seizing everything you can out of life. Everyday choose joy!!!!

~Annie

Tuesday, August 20, 2013

Annie’s Simple Peach Preservation


Today I harvested my first crop of peaches from my orchard.  I planted my peach trees three years ago, so I was very excited to have so many loading my trees, ready for harvest.

I have always found peaches to be very easy to process. Others have not found this to be the case, so I thought I would take a bit of time to explain my method, in hopes that others might be able to use it.

Annie’s Simple Peach Preservation

  • Wash Peaches
  • Fill large pot with water. Heat to boiling.
  • Once water is boiling, gently place peaches into water. Let peaches be for about five minutes.
  • Check peaches. Look for loosening of peach skin. Once several have loose skin, remove from boiling water.
  • Place peaches directly into ice water. Keep water cold by continuously running cold tap water in bowl that is holding the peaches. Peaches will shrivel a bit, and skins will become looser.
  • Select peach. Pinch skin between thumb and forefinger. Pull. Skin should pull right off of entire peach. Discard skin. I place mine in the chicken pan as a goodie for the chickens after I am completely finished.
  • Thrust thumb into peach until you feel the pit. Peach should split open easily, popping pit into your hand. Discard.
  • Repeat!
  • Once you have skinned and pitted all of your peaches, you may preserve them one of two ways. You may freeze or can them.
  • If you desire to can them, follow the directions in the Blue Ball book.
  • If you desire to freeze them, (as I do,) allow them to cool, then place in a labeled 1-quart freezer bag. I like to pre-measure the peaches so I will have the perfect amount for whatever recipe I may be making.
  • Lay flat in freezer. Once frozen, bags will be easily stackable for storage.

That is it! See? Simple! No more peeling the peaches with a knife. No more long hours bending over the counter. Well, at least not as many. I hope you find this method as useful and quick as I do.

Enjoy this wonderful season of canning and freezing, my friends! Way too soon the snow will be flying!

~Annie

If you would like to Follow Homestead Annie on Facebook to get more tips and recipes, please click here.

Friday, August 16, 2013

Annie’s Fast And Easy Freezer Corn


The other day, while on the way to Little Bug’s violin lessons, I noticed that the local farmer once again had his sweet corn booth set up by the side of the road.

For those of you that live in the country, it is a fairly normal sight to find an unmanned vegetable booth with a list of prices, a container of bags, veggies, and a can to throw your money in. It is operated on the honor system, and I love it.

I bought ten dozen ears of corn from the self-serve roadside stand, and traveled on my merry way. On the way home, I called my sweet mama and asked her if she would care to join me in a “Put up the sweet corn so we can eat it this winter” fest. I enticed her with free bags of sweet corn for her own freezer. She said yes almost immediately.

My sweet mama is the fastest person this side of Heaven when it comes to cutting corn off of the cob. Seriously. That woman puts us all to shame. However, using the tips and methods that we use, you can be finished with your sweet corn lickety-split as well.

Annie’s Fast And Easy Sweet Corn.

  • Husk all of your corn before you begin. I like to do mine outside, the evening before, if possible. I store it, neatly stacked, in a cooler overnight. I give the husks to our goat and pony. Some people use them for compost. Others throw them away.
  • The following steps are made for a two-person team, but can be modified for one or for three or more.
  • Set up the following: two cake pans on a waist high table. Two knives by the cake pans. Two shallow, large pans. One large bowl. One smaller bowl. Microwave steamer (I use the large steamer from Pampered Chef. If you do not have one, a covered bowl will work just fine!) A rubber spatula. A one-cup scoop or measuring cup. Quart sized freezer bags. A permanent black marker. A large bucket or bag to place corncobs in.
  • Once you have everything from the above list in place, you are ready to begin. From this point, it took my sweet mama and I 45 minutes to process, bag, and freeze ten dozen ears of corn.
  • Grab an ear of uncooked corn. Place it, wider side down in cake pan. Using sharp knife, cut kernels off in a vertical motion, rotating the ear as you go. Once finished, place empty cob in container. Repeat until cake pan is full.
  • Empty cake pan into large bowl. (First person continues to cut corn off the cob while second person starts the rest of the steps. During any lull time, the second person returns to the cake pan, cutting corn off the cob.)
  • Transfer enough kernels of corn to fill the steamer from the large bowl, to the small bowl.
  • Place contents of small bowl into the steamer. Add 2 Tablespoons of water. Place in microwave for five minutes. Refill small bowl with uncooked kernels so that it is ready for the steamer.
  • Once corn is steamed, remove from microwave and pour into large, shallow pans to cool. Repeat steamer process as directed above.
  • Using the permanent marker, write the date and contents on the quart-sized bags.
  • Using the one cup scoop, measure in however many cups you want per bag into the quart-sized freezer bags. As a reference, our family uses 3 cups per bag.
  • Squeeze all of the air out of the bag, sealing it in the process.
  • Shake bag in a horizontal position, flattening it in the process.
  • Lay bags in freezer. Once frozen, bags may be stacked for storage.

Yep. That is it. While it may seem like a lot of steps, once you get used to the routine, it will go quickly. As I mentioned, my sweet mama and I did 10 dozen ears in 45 minutes. The main holdup is waiting for the corn to get steamed in the microwave. If you have the next batch pre-measured, it will make it go much faster.

For pictures of the steps, just visit Homestead Annie’s Facebook page here.

Have a wonderful day, my friends!

~Annie

Monday, August 5, 2013

Annie’s Tips For A Successful Yard Sale


JP and I live a debt-free life. We also live on one income, making budgeting for the “wants” of life a bit more challenging. One thing that we have wanted for a number of years is a television.

I realize that flat screen TVs have been around for several years, but we have never had the money, nor desire, to get one in the past. We had inherited our 24 year-old television from a family who had it heading for a dumpster, nine years ago. It has serviced us well. Sure, we had to turn it on from a universal remote, praying each time that it would revive itself. Sure, you can’t read most of the wording on the screen. Sure, it weighs almost more than two grown men can manage, but it was free, and it was fulfilling a “want” in our lives.

A few weeks ago, I went to our state museum. They had a display on television broadcasting. There, plunked down in the middle of the display, was our TV. Our television had become a museum piece. It was time to think about a new one.

While we wanted a new TV, we simply had zero funds to purchase one. It was time to get creative. Enter: a yard sale.

I adore going to yard sales. I go to hundreds each year, scouring each for clothes, tools, and other items that we may need, yet cannot afford to pay for full price. I have even had sales at churches as fundraisers for different groups. However, I have avoided having sales at my home.

 I set aside this feeling, and went to work. The end goal was enough money for a new television, and a cleaned-out house to boot.

TC was my right hand throughout the entire process. While all of our eclectic family helped, TC was the mainstay. The encourager. The muscle. The comic relief when I started going over the “this is too overwhelming, let’s just forget it” ledge.

It took us two weeks to thoroughly go through the entire house. As is under beds, all closets, cabinets, drawers, and even the basement.

I borrowed tables and sign holders. Took out an ad in the local paper. Posted it on Facebook. Set it all up (6 large tables, 2 large trailers, and a tarp worth of things.) and waited.

People came in droves. Droves. They wanted to make deals and I wanted to sell my stuff. It was phenomenal. I was busy for two days straight.

The third day it poured rain all day, so I posted that everything was free. This helped get people to my house to take away the last of the treasures. In this way, I did not have to haul everything to the Goodwill.

By the end of the third day, I was down to two or three small boxes and one bag of stuff to donate to the local charity resale shop, and had made enough to get an even larger television than we had ever thought possible.

I am not sure why I avoided yard sales at my home for so long. Perhaps I will have another one someday in order to raise money for another “want.”

Whatever way it goes, I am thrilled that our eclectic family worked together towards our specific goal, and we made it.

I encourage you to think about having a sale of your own. Sometimes it is worth a little bit of hassle in order to meet the end goal.

Annie’s tips for a successful yard sale:

  • Price your items to sell. Yes, I realize that it was expensive when you bought it, but this is a yard sale. People will not pay high prices for the opportunity to haul your things away. You must stay in the mind set that you are here to get rid of your things. If you have things that are still worth a lot of money, you may want to look into selling them on ebay or craigslist.
  • Be willing to bargain. Many people want to make a deal. Be willing to do so. If you really want $10 for that awesome set of sheets that did not quite fit right on your bed, price them at $15 and be willing to take $7. When people know you will make deals, they will stay around longer and buy more.
  • Have someone there with you if at all possible. Having one or two extra people at your sale with you is a great thing. They can help answer questions, take money, bag things and be general moral support.
  • Greet everyone with a smile. People love to be greeted. It shows respect and proper etiquette. Most people that go to yard sales are friendly and open for chatting. Be willing to be the same way. I have left countless sales because of the rude behavior of the owner.
  • Advertise well. Make sure to list the big items that you have for sale. Furniture. Sizes of clothing. Vehicles. Toy sets. Appliances Etc. Write the dates, times, address, and clear directions in your ad for the paper. Be sure to invest in the ad for the paper. All the regulars will know to look there, and will map out their plan of attack. You want to make sure you are part of their plan.
  • Mark your sale well. Use neon pink or orange poster board and a large black marker. At the very least write “SALE” and an arrow pointing in the direction of your sale. You may also want to add the address and the hours of operation. Do not clutter the sign with lists of what is for sale. That is why you took out an ad.
  • Group like items. Kitchenware. Linens. Clothing (hang clothing if at all possible.) Toys. Tools. Etc.
  • Sort toys and put back into sets. Complete sets of toys and games will sell better and for a higher price than loose toys all thrown in together. Yes, this will take a bit of time, but it will be worth it financially. Trust me.
  • Bag the tiny toys and place one price on entire bag. People will willingly pay a few dollars more for a bag of Barbie accessories that is all together, rather than having to search through a bin full of miscellaneous things.
  • Have bags ready for your customers’ purchases.
  • Have enough change to get you through the day.
  • Offer to take your customers’ selections from them while they are still shopping. This will give you a chance to add it all up, as well as free their hands to select more items.
  • Always be rearranging items on your tables to fill in empty spots. No one wants to feel like they are getting the leftover items at a sale. Make sure your tables always look fresh and inviting.
  • Make sure your items are clean. Take the time to clean your things before setting them out on display.
  • Enjoy the day! If your sale goes like ours, you will have neighbors and friends stop in to say hello. You will meet new friends. You will end each day exhausted, yet content.

Yard sales are the perfect way to make a bit of money while at the same time cleaning out unused or unwanted items from your home. I hope your sale is as successful as ours!

~Annie

If you would like to follow Homestead Annie of Facebook, simply click here.

Friday, July 26, 2013

Homestead Annie's First Giveaway!


Anyone out there love The Wizard of Oz books? I am giving away an antique set of Oz books that include, Dorothy and the Wizard of Oz, The Road to Oz, The Land of Oz, The Tin Wood Man of Oz, The Wizard of Oz, and Ozma of Oz. I hate to see a great set of books separated, so I am finding them all a new, loving home.

To be entered to win the entire set, simply head on over to Homestead Annie's Facebook Page , "like" it, share it with your friends, and leave me a post as to what you love about the Wizard of Oz.. Encouragingly ask your friends to do the same!

The person that gets the most people to like Homestead Annie and leave a comment telling me who sent them, wins! (I will ship anywhere in the United States.)

Contest ends Friday, August 2, 2013. 

Good luck!

~Annie

Thursday, July 25, 2013

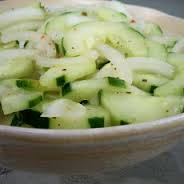
Annie’s Sweet Mama’s Cucumbers and Onions


This morning I had a bit of a problem. So many cucumbers had come on in the garden, that I had overflow.

 I did not need any more pickles made. I had plenty to eat fresh. There was only one thing left to do. I made my mama’s cucumbers and onions recipe.

Annie’s Sweet Mama’s Cucumbers and Onions

  • Chop cucumbers and place in deep dish that was a lid.
  • Chop onion and add to cucumbers. Mix.
  • In separate bowl, mix 1 part apple cider vinegar, 1 part sugar, and two parts water.
  • Heat liquid mixture in microwave for three minutes.
  • Pour liquid mixture over cucumbers and onions until just covered. If liquid does not cover the cucumbers and onions, just make more.
  • Salt and pepper to taste.
  • Refrigerate for at least 6 hours. Overnight is preferable.
If you are feeling sassy, add tomatoes.

This is a great dish for a summer picnic or a summer night’s meal at home.

Have a wonderful day, my friends!

~Annie

Monday, July 22, 2013

Annie's Oreo Rush


While I am allergic to sugar, my family, most definitely, is not. They sometimes remind me of this by roaming the kitchen, looking for a sweet treat.

I knew that it was time to make a special dessert when our house was declared a “no fun to eat” house by a member of my sweet family.

I looked around my house for items that I had left over from when I ate sugar, gathered them together, and designed my creation. Warning: This recipe is in no way low on calories.

Annie’s Oreo Rush

  • Grab a 9x13 pan
  • Mix a 15 oz package of crushed Oreos and ¾ cup of melted butter.
  • Pat down in the bottom of the pan.
  • Mix ½ cup sugar, 1 package of cream cheese, and 1 contain of cool whip. Cream. Spread on top of Oreo crust.
  • Mix 1- 3 oz package of vanilla pudding and 1 ½ cup of milk for 2 minutes until thickened. Spread on top of whipped cream mixture.
  • Whip a container of whipped cream until smooth. Spread on top of pudding.
  • Crush ½ of a package of Oreos and spread on top of whipped cream layer.
  • Chill.

My family loved this creation. I hope yours does as well!

~Annie

If you would like to follow Homestead Annie on Facebook, please click here.